
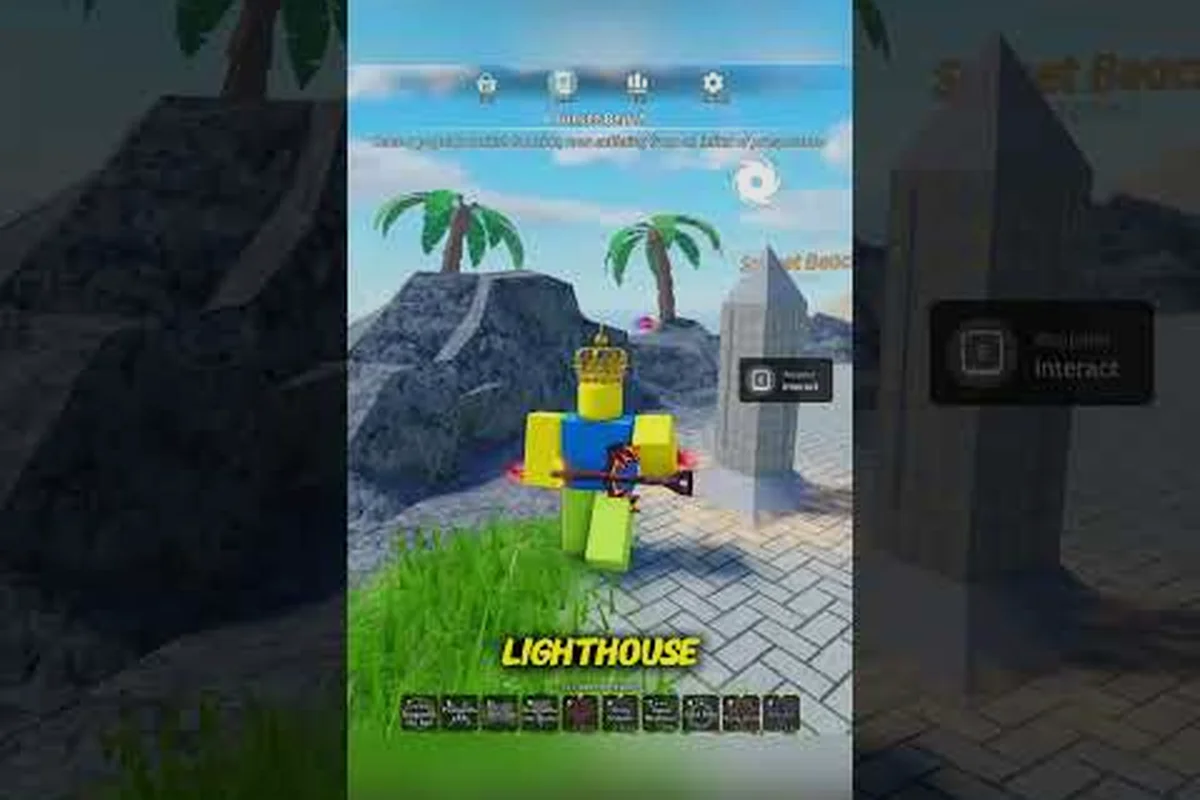
Unlock fast travel and location markers using Prospecting waypoints to teleport between dig sites, merchants, and crafting anvils without wasted travel time.
Prospecting Waypoints: Every Spawn Spot and Fast Travel Unlock Guide
Fast travel in Prospecting is the single biggest time-saver once you start bouncing between dig sites, and the entire teleport network runs through waypoints scattered across the map. Knowing where every waypoint sits — and which tool you need to actually dig at the location it serves — is the difference between a five-minute jog and a one-second teleport.
This guide catalogs every Prospecting waypoint, maps each one to a specific dig area, and walks through the unlock conditions, toughness gates, and teleport quirks that trip up new prospectors. Whether you are still hauling pans in Rubble Creek or pushing into the deeper biomes, the data below keeps your route tight and your inventory moving.
How Waypoints Work in Prospecting
Waypoints are small fixed markers that act as teleport anchors. When you stand near one and interact, it registers as "discovered," and the Prospecting fast travel menu lists it as a destination. The marker itself does not move or despawn, but you must physically walk to each waypoint at least once before you can use it as a teleport target.
According to the Prospecting community wiki, every major dig area has exactly one waypoint tied to it, and the menu lets you jump between any two discovered markers for free. There is no cooldown, no currency cost, and no item consumption — the only requirement is that you have visited the waypoint in person at least once.
A few rules govern how the system behaves, and understanding them upfront saves you backtracking across Prospecting's sprawling dig zones. Every waypoint sits at a fixed coordinate near the center of its assigned dig site — for example, the Rubble Creek marker is positioned just above the river fork — so once you physically cross that threshold, the discovery flag triggers instantly and the entry locks into your Prospecting fast travel menu. Because the teleport network treats each marker as a one-to-one binding rather than a shared hub, the order in which you visit prospecting waypoints does not matter, but the requirement to walk there first does, which is why speedrunners still allocate the first ten minutes of any fresh save to clearing all waypoint locations on foot.
-
Per-area binding: Each waypoint unlocks fast travel for one specific dig zone. You cannot teleport from a waypoint in Rubble Creek directly into the Azuralite Oasis — you can only target the waypoint you registered, then walk or pan into nearby deposits.
-
No carry-over on reset: Community testing suggests waypoint discovery is tied to your current save, so wiping progress will require re-registering markers.
-
Marker persistence: Once discovered, the waypoint stays in your menu permanently, even if you sell tools, change servers, or leave the area for a long stretch.
The official Prospecting game page on Roblox confirms the existence of a teleport network, and community videos like afterh4ze's waypoint tour walk the full route in under ten minutes.
Every Prospecting Waypoint Location
Every entry below is sorted by ascending Toughness Gate (1 → 7) so you unlock fast travel in roughly the same order you survive the surrounding combat, starting with Rubble Creek at Gate 1 and ending with Overgrown Grotto and Abyssal Depths at Gate 7. Cross-reference the prospecting waypoint locations table against your journal stamps after each expedition to confirm none are missing, since the Abyssal Depths marker only appears after the Overgrown Grotto rope is interacted with on that same run.
| Area | Waypoint Spawn Spot | Nearby Deposit | Toughness Gate |
|---|---|---|---|
| Rubble Creek | Behind the Trader | Rubble Creek riverbed | 1 |
| Fortune River | Between the Engineer and Alchemist | Fortune River main pan zone | 2 |
| Fortune River Delta | Right beside the Old Prospector's cabin | Delta silt banks | 3 |
| Sunset Beach | Under the lighthouse | Beach tide pools | 3 |
| Crystal Caverns | Behind the Scientist, near the Azuralite Oasis opening | Azuralite Oasis | 5 |
| Caldera Island | Volcano overlook (Volcanic Ridge path) | Volcanic Ridge | 6 |
| Overgrown Grotto | Near the rope leading to Abyssal Depths | Overgrown Grotto pools | 7 |
| Abyssal Depths | Down the rope from Overgrown Grotto | Abyssal Depths | 7 |
Rubble Creek and Fortune River Waypoints
The first waypoint you encounter is the one behind the Trader in Rubble Creek, sitting roughly fifteen paces from the spawn pad. This marker unlocks fast travel into the tutorial riverbed, and you can register it as early as your first minute in-game using the default pan.
Roughly two zones to the east, the Fortune River waypoint sits between the Engineer and the Alchemist NPCs. Both vendors are hard to miss — the Engineer wears a hard hat, the Alchemist carries a glowing vial — and the waypoint is sandwiched between their stalls. Once discovered, this is the marker most players use to bounce back to mid-tier pan spots.
Mid-Game Waypoints: Delta, Sunset Beach, and Crystal Caverns
The Fortune River Delta waypoint rests right beside the Old Prospector's cabin, which doubles as a quest hub. From here you can pan the Delta silt banks, which require a slightly upgraded shovel. According to community reports, the Delta is the first location where a basic pan starts feeling underpowered, so teleporting in with a Bronze-tier or better tool is recommended.
At Sunset Beach, the waypoint sits directly under the lighthouse. You can register this marker before unlocking the Beach dig site if you walk the long way around the cliffs. The lighthouse quest, "Restoring The Lighthouse," is also handed out by the Lightkeeper NPC who stands at the top of the tower.
The Crystal Caverns waypoint hides behind the Scientist, near the opening to the Azuralite Oasis. This marker requires you to push into a darkness-tinged zone, so bringing a Firefly Flare (crafted from Firefly Stones) is essential before making the trip. The Caverns gate the Azuralite Oasis behind a toughness requirement of 5, so a Divine Shovel is the minimum-tier tool that can dig here.
Late-Game Waypoints: Caldera Island, Overgrown Grotto, and Abyssal Depths
The Caldera Island waypoint sits on the volcano overlook along the Volcanic Ridge path. Reaching the marker requires a toughness-6 tool such as a Refined or better shovel, and the surrounding lava tiles will chew through your pan if you are not careful.
Deeper still, the Overgrown Grotto waypoint is positioned near the rope that drops into the Abyssal Depths. The Grotto itself is a toughness-7 zone, so most players need a Lifetouched Shovel or equivalent to register this waypoint and pan the surrounding pools.
Finally, the Abyssal Depths waypoint sits at the bottom of the rope you rappel down from Overgrown Grotto. It is the deepest known waypoint, sharing the toughness-7 requirement, and it is the only teleport anchor inside the Abyssal Depths biome.
How to Unlock Waypoints Step by Step
Unlocking a waypoint in Prospecting is a three-step process, but the prep work changes dramatically as you push into harder biomes. The checklist below keeps the grind predictable by mapping each zone's hidden waypoint location to the exact tool tier you must carry — because teleporting into Azuralite Oasis or Abyssal Depths without a Divine Shovel and enough Firefly Flares means a wasted trip, and toughness-7 biomes will one-shot you before the interact prompt ever appears. Treat the table as your prep contract: match the biome, match the gear, then walk to the marker.
| Step | Action | Tool Requirement | Common Mistake |
|---|---|---|---|
| 1 | Travel on foot to the waypoint's spawn spot | None for the first two zones, scaling to toughness 7 in late game | Forgetting a Firefly Flare in dark zones |
| 2 | Walk up to the marker and press the interact key | None | Standing too far away and missing the prompt |
| 3 | Confirm the discovery popup in the teleport menu | None | Closing the popup before it registers |
The early game is forgiving. Rubble Creek and Fortune River require no special prep beyond the default pan and the starter shovel. You can register both waypoints within the first ten minutes, which immediately gives you a two-anchor teleport network.
Mid-game biomes expect a tiered prep curve that matches the waypoint table above, and skipping that curve is the single biggest reason players burn a long teleport only to die before the interact prompt appears. For example, Fortune River Delta checks your Bronze or Iron shovel the moment you load in, while Sunset Beach punishes unarmored players with lava-adjacent tiles along the lighthouse route — a checkpoint most guides treat as cosmetic but that, in practice, drops first-time visitors below half health before they reach the marker.
-
Fortune River Delta expects a Bronze or Iron shovel so you are not stuck panning slowly after teleporting in.
-
Sunset Beach stays accessible, but the path from spawn to the lighthouse waypoint runs through a hostile stretch where lava-adjacent tiles can damage unarmored players.
-
Crystal Caverns and Azuralite Oasis demand a Divine Shovel (toughness 5) plus a stack of Firefly Flares for the darkness mechanic.
Late-game zones have the highest prep bar. Caldera Island, Overgrown Grotto, and Abyssal Depths each require toughness-6 or toughness-7 tools, and the Abyssal Depths in particular expects you to bring multiple Firefly Flares because the darkness envelops you the moment you drop down the rope.
Fast Travel Tips, Teleport Quirks, and Money-Saving Routes
Teleport is free across the entire Prospecting waypoint network, but the system still hides a few sharp edges that punish careless routing. Cooldowns reset per character rather than per account, so swapping alts between pan runs will not refresh your fast travel timer the way many new miners expect. Cross-region waypoints also charge a small durability toll on your pickaxe, and teleporting while over-encumbered with ore can clip you through terrain — both quirks make it worth waiting for the 30-second timer rather than spamming the waypoint button. Players who internalize these rules spend more time panning and less time running back to camp empty-handed.
Pair Waypoints With Vendor Runs
Every waypoint sits near at least one vendor, which means a teleport is also a restock. The Rubble Creek waypoint sits beside the Trader, the Fortune River marker is between the Engineer and Alchemist, and the Fortune River Delta waypoint is right next to the Old Prospector's cabin. Bouncing between waypoints to sell gems, repair tools, and rebuy pans is the single fastest way to keep your inventory liquid — a useful habit if you are also working through a money-making route like the one covered in our guide on How to Get Money Fast.
Use the Teleport Menu to Skip Vertical Climbs
Several waypoints sit at the top of long climbs — the Caldera Island marker caps a volcano overlook, and the Overgrown Grotto marker is right next to a rope that drops straight down. Once you have discovered both, the teleport menu lets you skip the climb entirely, which matters because the climbing animation locks your tool in hand and exposes you to fall damage on a mistimed jump.
Stack Firefly Flares Before Deep Teleports
The Crystal Caverns and Abyssal Depths waypoints are dark-zone anchors. Community testing has shown that running out of Firelight Flares inside the Abyssal Depths locks you in place until the darkness meter drains, so the safe play is to teleport in with at least three flares pre-stacked in your hotbar. The Abyssal Depths entry on the community wiki explicitly recommends a Lifetouched Shovel and multiple Firefly Stones for exactly this reason.
Re-Register Markers After Major Patches
Game updates occasionally reposition vendors and terrain, which can shift the visible spawn spot of a waypoint. If a teleport target seems missing, walk the area slowly and look for the small glowing pillar — it is intentionally subtle so it does not clutter the dig site. Community videos like miss_moonfox's waypoint walkthrough are worth rewatching after each major update because the routes can shift.
Waypoint Progression Table: Recommended Order
Pacing matters more than raw unlock speed because Prospecting waypoints are gated by both tool tier and biome-specific prep items, not just distance from spawn. For example, attempting Crystal Caverns at toughness-4 with a Bronze shovel will soft-lock your teleport options since the Azuralite Oasis exit requires Firefly Flares you cannot yet afford. The table below ranks every Prospecting waypoint by the tool tier you need and the cheapest unlock path, prioritizing the clean Rubble Creek → Fortune River → Fortune River Delta chain before the shovel-gated jump to Sunset Beach and beyond.
| Priority | Waypoint | Min Tool | Prep Needed | Why This Order |
|---|---|---|---|---|
| 1 | Rubble Creek | Starter pan | None | Tutorial zone, no gate |
| 2 | Fortune River | Starter pan | None | Same early-game area, walkable from spawn |
| 3 | Fortune River Delta | Bronze shovel | None | First "real" upgrade checkpoint |
| 4 | Sunset Beach | Bronze shovel | None | Easy walk, lighthouse quest rewards |
| 5 | Crystal Caverns | Divine Shovel (toughness 5) | Firefly Flares | Unlocks Azuralite Oasis, big gem payouts |
| 6 | Caldera Island | Toughness-6 shovel | Heat-resistant gear | Volcanic Ridge rewards |
| 7 | Overgrown Grotto | Lifetouched Shovel (toughness 7) | Firefly Flares | Gate to Abyssal Depths |
| 8 | Abyssal Depths | Lifetouched Shovel (toughness 7) | Multiple Firefly Flares | Deepest biome, top-tier fossils |
Because every Prospecting waypoint sits on a hard unlock chain — Rubble Creek through Abyssal Depths in eight sequential nodes — each marker both gates and rewards the next biome's dig site, so skipping Caldera Island locks you out of Overgrown Grotto's Lifetouched Shovel checkpoints and strands your teleport menu with dead entries. This is why the table above deliberately front-loads the no-prep Bronze shovel trio (rows 1-4) before the Firefly Flare-gated Crystal Caverns pivot: players who rush to row 5 without stockpiling flares at Fortune River Delta waste 15-20 minutes backtracking through already-cleared biomes. The teleport network only becomes a true fast travel shortcut once all eight waypoints are live, since partial activation forces linear traversal between your current node and the nearest unlocked marker.
Common Waypoint Mistakes and How to Avoid Them
Each slip — whether it's overshooting a vein, backing into dead terrain, or chaining a teleport to a fast-travel node you just came from — can easily cost a prospector 3 to 5 minutes per run as you correct course or re-fast-travel to the right prospecting waypoint. Across a typical 3-to-4-hour prospecting session, those small detours compound into 30-plus minutes of lost mining time, which often makes the difference between finishing a deposit grind and logging off one node short.
Teleporting Without a Repair Tool
Every waypoint is near a vendor, but vendors are not always in the same biome as the marker. The Overgrown Grotto and Abyssal Depths waypoints in particular are far from any repair NPC, so teleporting in with a cracked shovel means a long walk back to the surface. The fix is simple: keep a backup tool in your inventory before every teleport.
Walking Past the Marker
Waypoints are small, low-poly pillars with a faint glow. In busy biomes like the Fortune River Delta, the marker can blend into the background noise. If you walk through a waypoint spawn spot and the interact prompt does not fire, crouch and look around — the marker often sits half-buried in terrain props.
Assuming Every Dig Site Has a Waypoint
Not every pan spot is anchored to a teleport marker. Some side deposits are reachable only by walking from the nearest waypoint, which is fine once you have the network unlocked but punishing on a fresh save. The wiki lists only eight waypoints for the entire map, so do not expect a marker in every biome.
Ignoring the Darkness Mechanic
Teleporting into Crystal Caverns or Abyssal Depths without a Firelight Flare will leave you stuck in the dark. The community wiki is explicit: a Firefly Flare is required to push back the darkness, and a stack of Firefly Stones is required to craft more flares mid-session. Bring at least three.
For more strategies and details, explore our Map Guide.
Frequently Asked Questions
How many waypoints are there in Prospecting?
There are currently eight confirmed Prospecting waypoints, one for each major dig area: Rubble Creek, Fortune River, Fortune River Delta, Sunset Beach, Crystal Caverns, Caldera Island, Overgrown Grotto, and Abyssal Depths. The community wiki tracks this list and updates it when new biomes ship.
Do waypoints cost anything to use?
No, Prospecting fast travel is completely free. There is no teleport fee, no per-use cooldown, and no item cost — the only requirement is that you have discovered the destination waypoint by walking to it at least once. This makes the Prospecting teleport system one of the most player-friendly in the genre.
What tool do I need for the Abyssal Depths waypoint?
The Abyssal Depths waypoint requires a toughness-7 shovel, such as the Lifetouched Shovel, plus multiple Firefly Flares to survive the darkness mechanic. You reach the marker by rappelling down the rope from the Overgrown Grotto waypoint, so make sure your inventory is fully stocked before teleporting into Overgrown Grotto.
Can I unlock waypoints in any order?
Yes, but the practical order is dictated by toughness gates. Early waypoints like Rubble Creek and Fortune River are unlocked on foot with starter gear, while Crystal Caverns requires a Divine Shovel (toughness 5) and the late-game waypoints need a Lifetouched Shovel (toughness 7). Following the biome progression order saves the most time.
Do waypoints reset if I join a new server?
Community testing indicates waypoint discovery is saved server-side and persists across server hops, so your teleport menu stays full when you rejoin. However, completely resetting your character will require re-registering all eight waypoints on foot, which is why experienced players recommend a quick waypoint sweep on every fresh save.